
Introduction to Child Themes
WordPress defines a child theme as a theme that “inherits the look and feel of the parent theme and all of its functions but can be used to make modifications to any part of the theme.” If you customize the child theme, those modifications don’t affect the parent theme and are kept separate. This way, if you update the parent theme, your customizations won’t be overridden.
Due to its great flexibility and functionalities, child themes are the recommended method to change themes in WordPress.
Benefits of Using a Child Theme
As I stated, arguably the most significant benefit of using a WordPress child theme is the ability to make whatever design and code change you want and then keep them when updating.
Other main benefits of a WordPress child theme include the following:
- Customizations are kept separate from the parent theme’s files, so the modifications are preserved when the parent theme is updated.
- Avoid chances of breaking or messing up the parent theme’s files.
- They’re usually small and light so that you can replicate your customizations in another project.
- They allow you to test different customizations before applying them to the parent theme.
- Easy to Customize and Extend: This is especially true if you use a solid, well-known WordPress framework.
- Code Fallback: If you mess something up or get stuck, you can always fall back to the failsafe parent theme and see where you went wrong.
- Design and Layout Options: Most child themes come with a prebuilt design and layout that you can easily manipulate and make your own.
- Save development time since they inherit the parent’s theme design and functionalities.
Using a plugin is one of the easiest ways to create a WordPress child theme. The Plugin can walk you through the entire process, meaning you won’t need to touch any code.
In this tutorial, we’ll be working with the Child Theme Configurator plugin. This user-friendly tool can help you analyze your theme for issues, create a child theme, and even edit it to meet your web design layout and style specifications.
Step 1: Install and activate the Child Theme Configurator Plugin
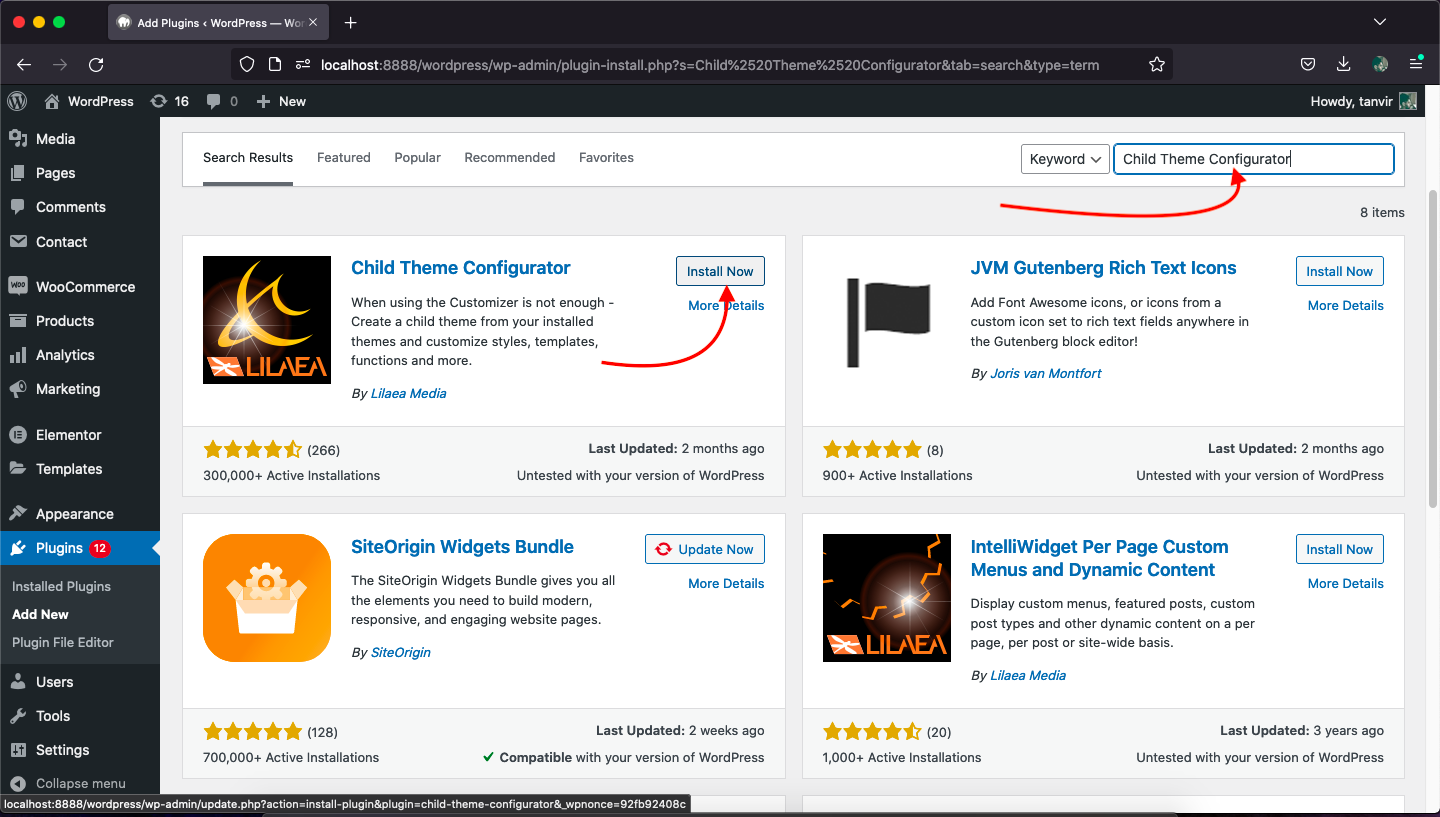
Go to your WordPress dashboard, then navigate to Plugin > Add New.
In the search input field, write “Child Theme Configurator” then install and activate the following Plugin.
Step 2: Analyze the Parent Theme
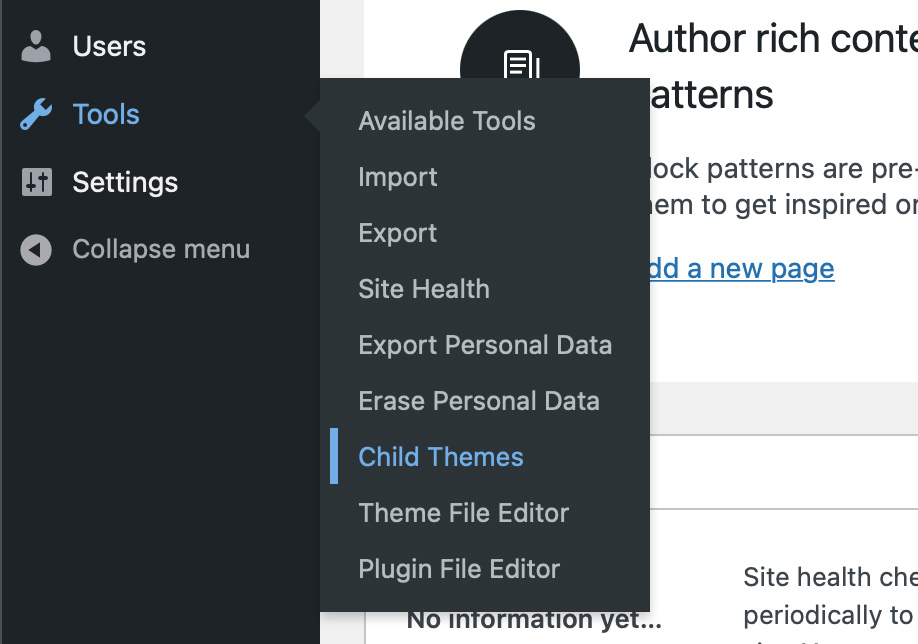
Next, navigate to Tools > Child Themes:
The Plugin will walk you through the steps to create a child theme. Simply select CREATE a new Child Theme to get started:

You’ll be prompted to select your parent theme from the dropdown menu. If you have multiple themes on your WordPress site, make sure to choose the one you want to customize:

Now hit Analyze to check the parent theme for any potential code issues:

If the Plugin finds any compatibility or coding issues, it will list them here. Otherwise, you’ll see a green success message telling you it’s okay to proceed with making the child theme:
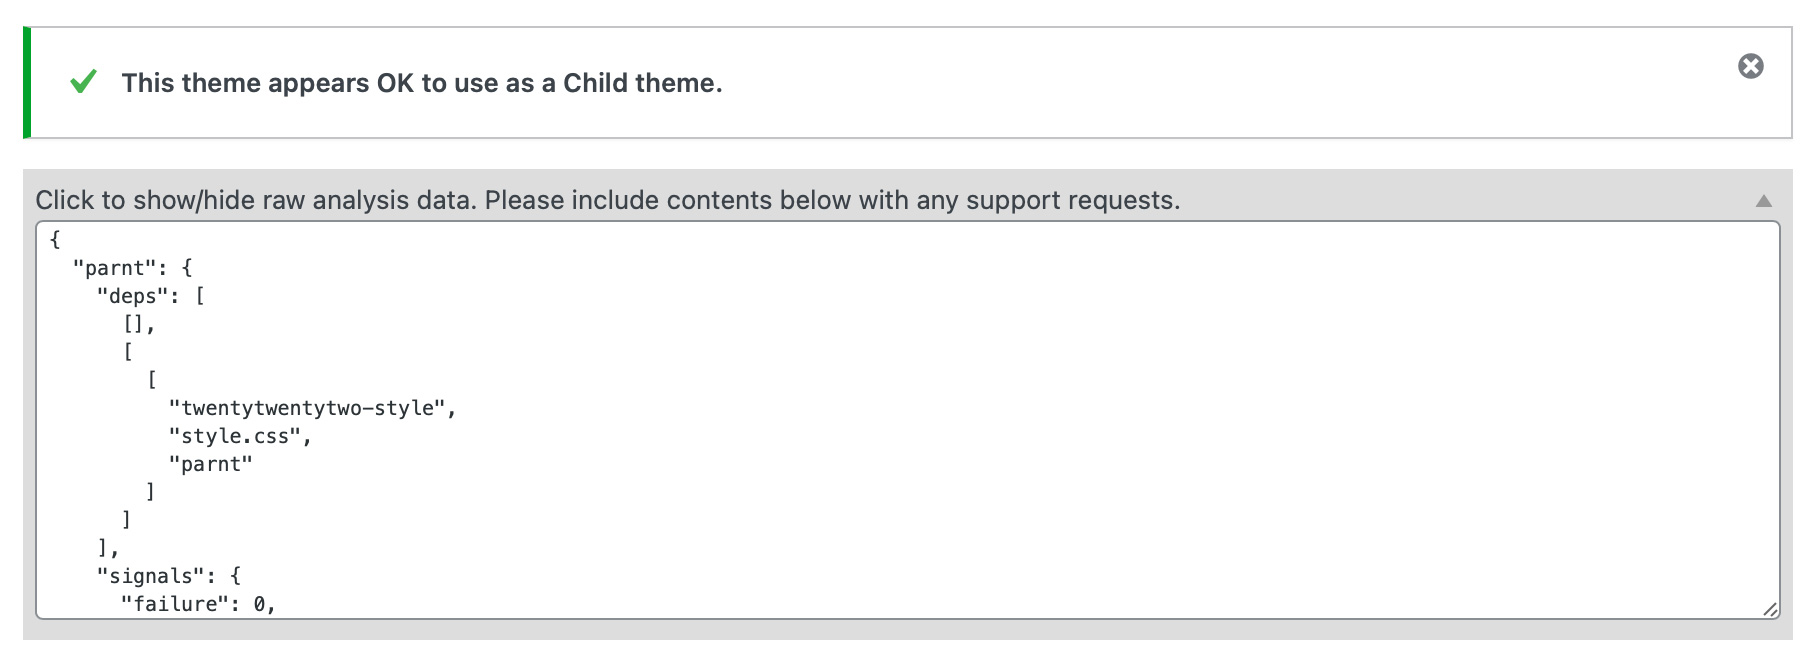
Once you’ve determined your parent theme will be suitable for a child theme, you can move on to the next step. You can also show a raw data analysis or submit support requests to the Plugin’s creator from this page.
Step 3: Name Your Child Theme Directory
Next, you’ll be prompted to name the directory for your child theme. It will be the name of the folder within your website’s files.
You can name it anything you like as long as it’s unique to your site and contains acceptable characters. We’re using “twentytwentytwo-child” for simplicity’s sake:

Keep in mind that naming the theme directory is not the same as naming your child theme or adding a theme description. Those steps will come later.
Step 4: Select the Child and Parent Theme Stylesheets
Next, you’ll need to choose the new stylesheet for your child theme. If you select the primary stylesheet (style.css), your custom styles will override the existing theme content. This is the default option, and we recommend choosing it if you’re new to child themes:

You’ll now be prompted to choose your parent theme stylesheet handling method. There are various options, but we recommend sticking with Use the WordPress style queue for most use cases:
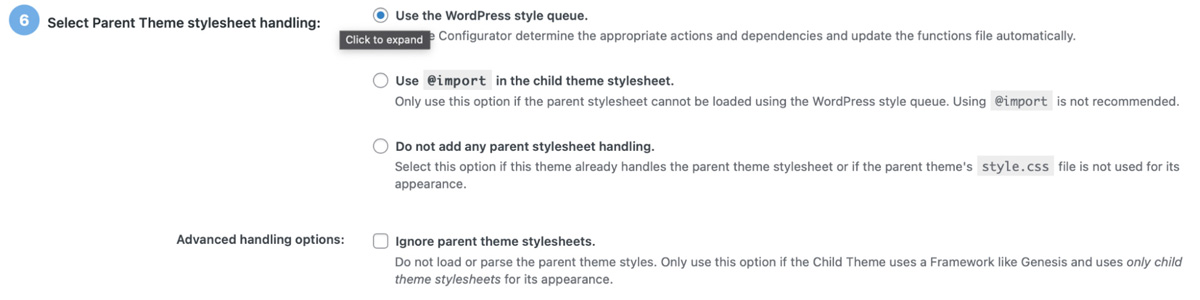
As a beginner, it’s best to use the default option until you’re more familiar with how the parent theme handles the stylesheet. The other options aren’t always compatible with all themes.
Step 5: Name Your Child Theme
The next step is naming your child theme and writing a description for it:
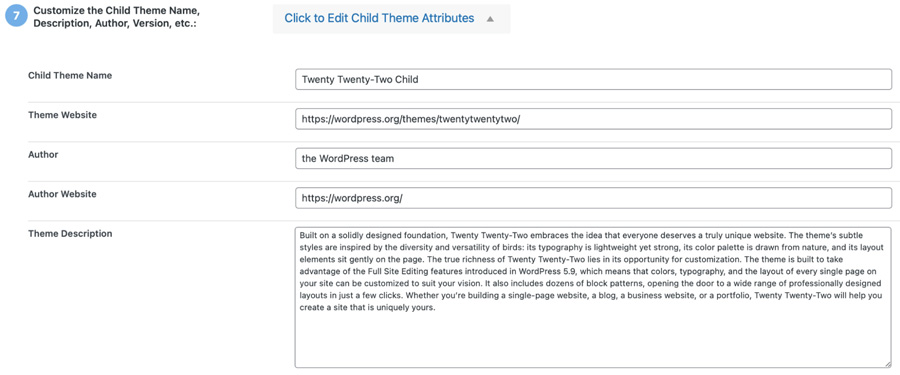
Child Theme Configurator will pull the default information from your parent theme and display it here. If you’re simply making a child theme for personal use, you can leave the data as-is. However, if your parent theme will serve as the basis for a new theme you’re developing, you might like to add a brief description and a unique name.
Step 6: Copy the Parent Settings to the Child Theme
The Plugin will now ask you to confirm that it can copy the parent theme’s settings to your child theme:

This step will ensure that your child theme pulls all its functionality and appearance from the parent theme. However, if you’re working with a premium or restricted theme as the parent, you may not be able to perform this step.
Step 7: Create Your New Child Theme and Preview it
The final step is making your child theme. Click on the Create New Child Theme button and wait for the Plugin to do its job:

You should get a notification that your child theme was created successfully:

You should always preview your child theme before activating it on your website.
This step will help you verify that everything is working as it should. Then, hit Activate & Publish to start working with your child theme.


